Http
Learn about http and how to implement it effectively.
3 min read
🆕Recently updated
Last updated: 12/9/2025
HTTP (Agentflow Node)
The HTTP node in InnoSynth-Forjinn's Agentflow provides a versatile way to send HTTP requests to any external API or web service. This node is fundamental for integrating your AI workflows with a vast array of online services, fetching real-time data, or triggering actions in other systems.
Purpose
The HTTP node is designed for:
- API Integration: Connecting to RESTful APIs, GraphQL endpoints, or any web service accessible via HTTP.
- Data Retrieval: Fetching dynamic data (e.g., weather, stock prices, news) to enrich AI responses.
- Action Triggering: Sending data to external systems (e.g., updating a CRM, sending notifications, logging events).
- Custom Web Interactions: Performing any operation that can be done via an HTTP request.
Appearance on Canvas
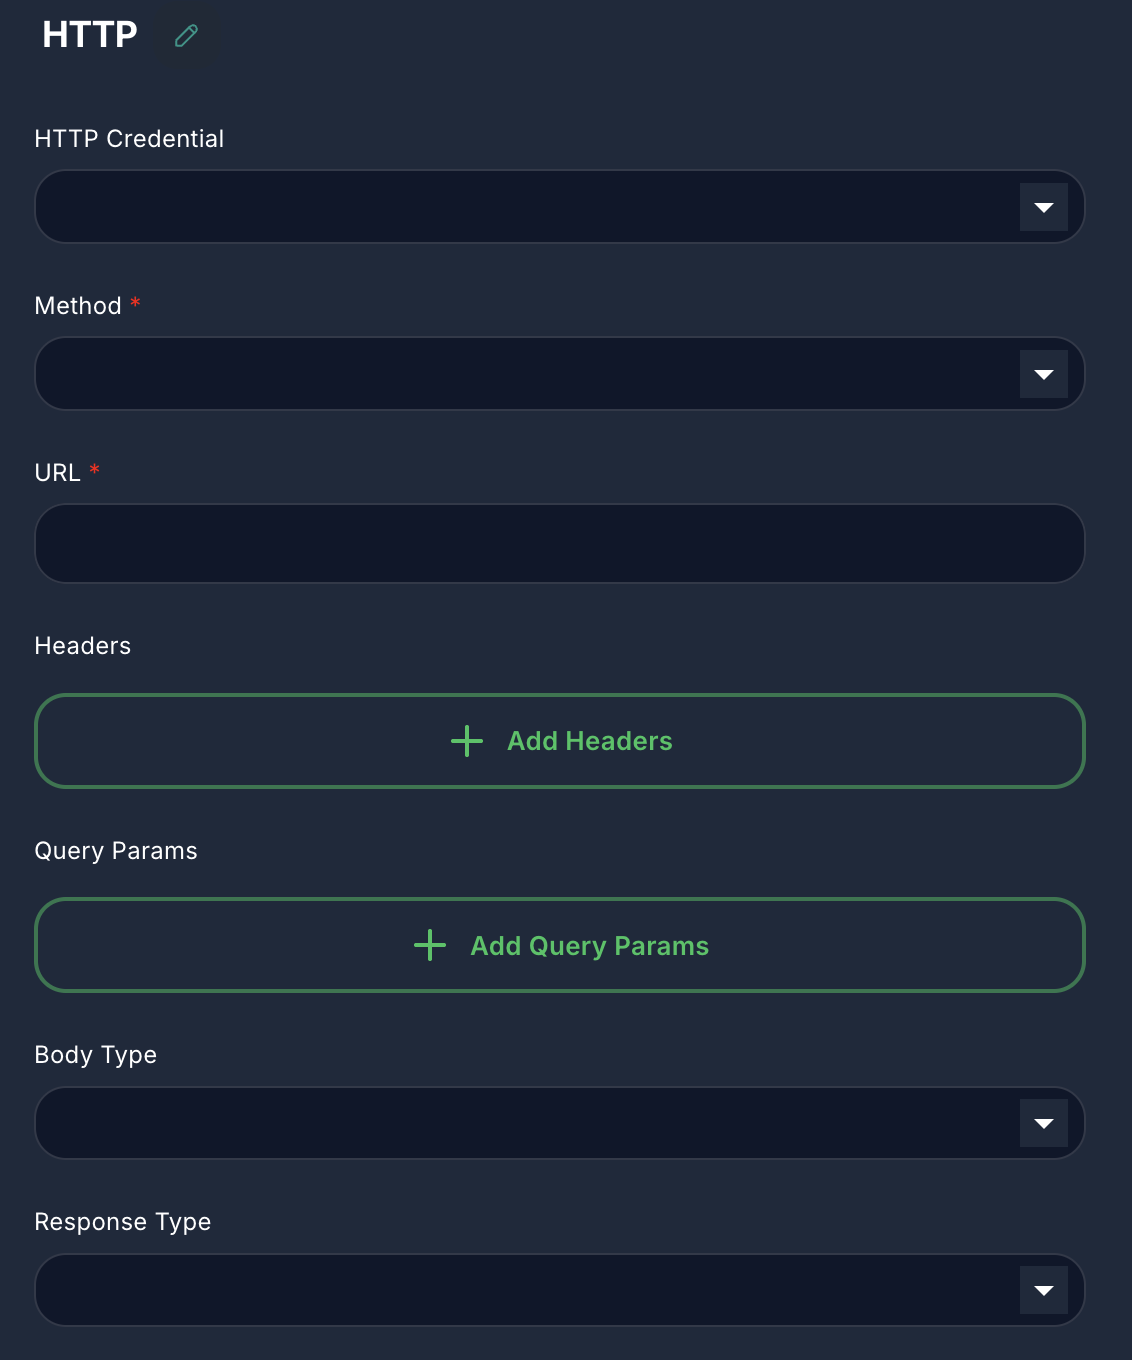
Configuration Parameters
The HTTP node offers comprehensive options for configuring your HTTP requests.
1. Method (Required)
- Label: Method
- Type:
options - Default:
GET - Options:
GET,POST,PUT,DELETE,PATCH - Description: The HTTP method to use for the request.
2. URL (Required)
- Label: URL
- Type:
string - Description: The full URL of the endpoint you wish to call. Supports variables.
3. Headers (Optional)
- Label: Headers
- Type:
arrayof objects - Description: Custom HTTP headers to include in the request. Useful for
Content-Type,Accept, or custom API keys.- Key: The header name (e.g.,
X-API-Key). - Value: The header value. Supports variables.
- Key: The header name (e.g.,
4. Query Params (Optional)
- Label: Query Params
- Type:
arrayof objects - Description: Key-value pairs that will be appended to the URL as query parameters (e.g.,
?param1=value1¶m2=value2).- Key: The query parameter name.
- Value: The query parameter value. Supports variables.
5. Body Type (Optional)
- Label: Body Type
- Type:
options - Options:
JSON,Raw,Form Data,x-www-form-urlencoded - Description: Specifies the format of the request body. Only applicable for
POST,PUT,DELETE,PATCHmethods.
6. Body (Optional)
- Label: Body
- Type:
string(for JSON/Raw) orarrayof objects (for Form Data/x-www-form-urlencoded) - Description: The content of the request body.
- For
JSONorRawbody types, provide a string (JSON string or raw text). Supports variables. - For
Form Dataorx-www-form-urlencoded, provide an array of key-value pairs.- Key: The field name.
- Value: The field value. Supports variables.
- For
7. Response Type (Optional)
- Label: Response Type
- Type:
options - Options:
JSON,Text,Array Buffer,Raw (Base64) - Description: The expected format of the response from the server. This determines how the node will parse the incoming data.
8. HTTP Credential (Optional)
- Label: HTTP Credential
- Type:
credential - Credential Names:
httpBasicAuth,httpBearerToken,httpApiKey - Description: Select an existing HTTP credential to authenticate your request. Supports Basic Authentication, Bearer Token, or custom API Key headers.
Inputs & Outputs
- Input: Typically receives a trigger or data that informs the HTTP request (e.g., a search query, data to be sent).
- Output: Produces an object containing the HTTP response, including:
data: The parsed response body (JSON, text, base64, etc.).status: The HTTP status code (e.g., 200, 404).statusText: The HTTP status message (e.g., "OK", "Not Found").headers: The response headers.
Example Usage: Fetching a User Profile
Let's say you want to fetch a user's profile from an external API using their ID.
- Connect a node that provides the
userId(e.g., from aStartnode or acustom function) to the input of anHTTPnode. - Configure Method:
GET - Configure URL:
https://api.example.com/users/{{userId}}(assuminguserIdis a variable). - Configure HTTP Credential: Select an appropriate
HTTP Bearer Tokencredential if the API requires authentication. - Configure Response Type:
JSON - Connect to Chat Output: Connect the output of the
HTTPnode to aChat Outputnode.
When this workflow runs, it will fetch the user's profile data, and the JSON response will be displayed. You can then use other nodes to parse and utilize this data.