Execute Flow
Learn about execute flow and how to implement it effectively.
Execute Flow (Agentflow Node)
The Execute Flow node in InnoSynth-Forjinn's Agentflow allows you to trigger and execute another existing chatflow or agentflow from within your current workflow. This powerful feature promotes modularity, reusability, and the creation of complex, interconnected AI applications.
Purpose
The Execute Flow node is ideal for:
- Modular Design: Breaking down large, complex workflows into smaller, manageable sub-flows.
- Reusability: Reusing common AI logic (e.g., a sentiment analysis sub-flow, a data retrieval sub-flow) across multiple main workflows.
- Orchestration: Chaining multiple AI applications together to achieve a larger goal.
- Dynamic Execution: Deciding which sub-flow to execute based on runtime conditions.
Appearance on Canvas
Configuration Parameters
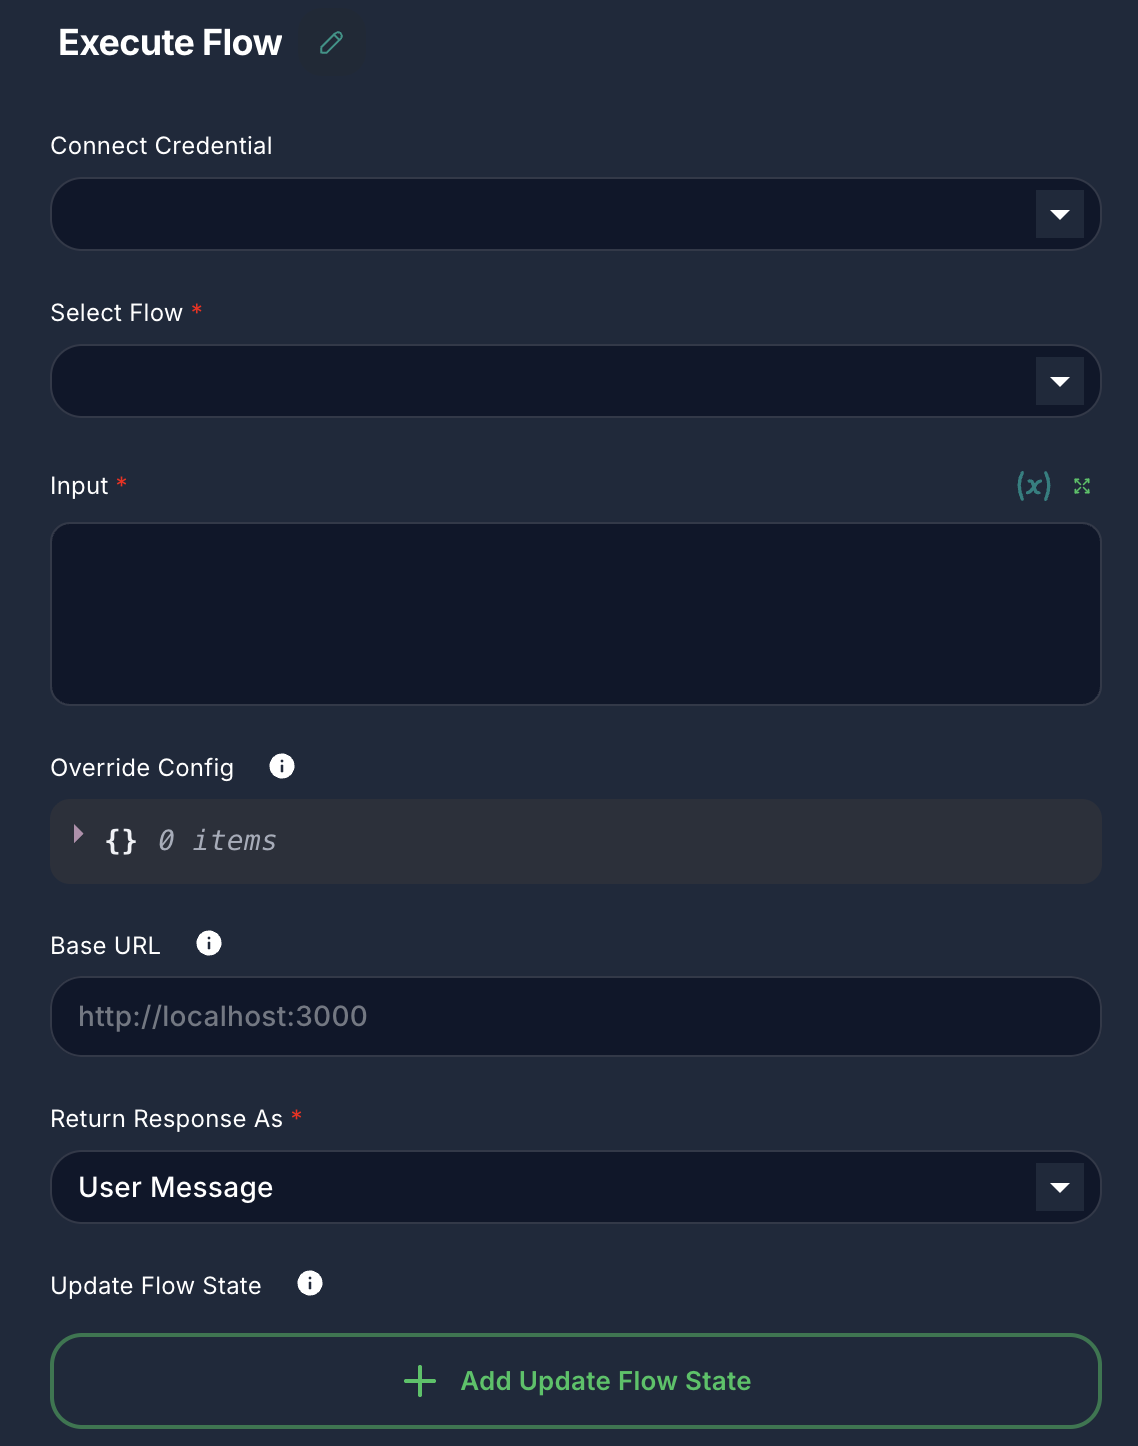
The Execute Flow node requires you to specify which flow to execute and what input to provide it.
1. Select Flow (Required)
- Label: Select Flow
- Type:
asyncOptions(loads available Chatflows and Agentflows) - Description: Choose the target chatflow or agentflow that this node will execute. You will see a list of all available flows in your workspace.
- Important: You cannot select the current flow to avoid infinite loops.
2. Input (Required)
- Label: Input
- Type:
string - Description: The input message or data that will be passed to the selected sub-flow. This typically corresponds to the
questioninput of the target flow. Supports variables.
3. Override Config (Optional)
- Label: Override Config
- Type:
json - Description: Allows you to override specific configuration parameters of the target sub-flow. This is useful for dynamically adjusting settings (e.g., LLM temperature, tool parameters) for the sub-flow's execution. Provide a JSON object with the desired overrides.
4. Base URL (Optional)
- Label: Base URL
- Type:
string - Placeholder:
http://localhost:3000 - Description: The base URL of the InnoSynth-Forjinn instance where the target flow is hosted. By default, it uses the URL of the incoming request. This is useful if you need to execute a flow through an alternative route or on a different instance.
5. Return Response As
- Label: Return Response As
- Type:
options - Default:
userMessage - Options:
User Message,Assistant Message - Description: Determines how the response from the executed sub-flow is formatted in the output of this node.
- User Message: The response is treated as if it came from a user.
- Assistant Message: The response is treated as if it came from an assistant.
6. Update Flow State (Optional)
- Label: Update Flow State
- Type:
arrayof objects - Description: Allows you to update the runtime state of the current workflow based on the execution of the sub-flow.
- Key: The key of the state variable to update.
- Value: The new value for the state variable. Supports variables and the output of the executed sub-flow (
{{ output }}).
Inputs & Outputs
- Input: Receives the trigger to execute the sub-flow, along with any data to be passed as input to the sub-flow.
- Output: Produces the final response or output generated by the executed sub-flow. This output can then be used by subsequent nodes in the current workflow.
Example Usage: Chaining AI Services
Consider a scenario where you have a specialized chatflow for "Product Recommendation" and another for "Order Status." You can use Execute Flow to call these based on user intent.
- Connect a
condition agentnode (for intent recognition) to the input of twoExecute Flownodes. - Configure
Execute Flow 1(Product Recommendation):- Select Flow:
Product Recommendation Chatflow - Input:
{{question}}(user's original query)
- Select Flow:
- Configure
Execute Flow 2(Order Status):- Select Flow:
Order Status Chatflow - Input:
{{question}}
- Select Flow:
- Connect Outputs: Connect the outputs of the
Execute Flownodes to aChat Outputnode.
Now, depending on the user's intent, the appropriate sub-flow will be executed, and its response will be returned to the user.